


Charles Clarke - How To Perform The Hot-Towel Shave Correctly
The Hot-Towel Shave, the cut-throat shave, the traditional shave, or the Turkish Shave is all more or less the same thing even though they are referred to by different names and titles. They should all basically include the same procedures and stages from start to finish, the same instruments and the same end result! A perfectly shaved smooth face, free from razor burn, cuts or nicks.
Unfortunately though, many barbers do not provide this service in their salons either because they themselves cannot shave a client, or they do not have staff that can do the same. Also, of those that do, they do not all provide this service correctly and have based their shave around the myths generated and associated with old wives tales. Either way, in my opinion, performing a shave incorrectly is equally just as bad as not providing the service in the first place!
 Many men do not value the importance of performing a shaving ritual correctly, and most, myself included from time to time fall foul to the vices of these quick fix shaving products that are mass marketed through the media. However, performing a shave correctly should be to the foremost of a man's mind when he picks up his razor! Let’s be honest, if the products that are being mass marketed with the use of digital imagery, celebrities and multi-million pound advertising programmes actually did the job they claimed, then they wouldn't need movie stars or sports heroes to endorse them! Most of these commercial products are based around the need to reduce the friction caused by frantic speed shaving - of which most of us are guilty, and therefore have produced products that do nothing more than lubricate the skin.
There is a procedure that must be adhered to when carrying out the Hot-Towel Shave in your salon, and by using this one can reduce client skin irritation and boost the revenue generated by the art of shaving. First off, let's disperse some of the long running myths surrounding the Hot-Towel Shave. Whatever the client's normal shaving habits are then the correct procedure to produce the ultimate shave will depend on the length of the beard or bristle. Advising your client to make sure they have a good growth, or not to shave for a week, does nothing more to the outcome of the shave than making it uncomfortable for both you and your client! If a client shaves every morning, or every two mornings then the correct advice to give your client before coming to your salon for the shave is to miss a shave from his normal routine - That's all! Otherwise, the beard is too long, the soap cannot penetrate through to the skin, and the hair bends underneath the razor.
Another myth is the application of the hot-towel before the shave. The belief that the hot-towel softens the bristle and allows for a smoother shave is nothing more than a myth! Right, at this point I think it is time to get down to the business of performing your shave with a professional approach. The beginning of the shave must be performed with a strict protocol adherence. The client, once comfortably seated should be assessed on the condition of his skin, and the length of the bristle. If the skin has an unusually large number of skin tacks, moles or infection, then the client should be advised that to continue with the procedure would not be in his best interest, and would maybe just benefit better from a hot-towel facial steam or massage treatment if offered. Furthermore, if the bristle is longer than the 3mm (the length of a number 1 blade) then it will need to be pre-trimmed with a clipper such as the Wahl Sterling 2 machine or similar. Bringing the beard/stubble to the 0 position length is best for the ideal shave.
Once this has been completed, the client is ready for shaving. The first thing for the barber to do is to lather up his brush. This should be done by using a Badger Hair Silver Tipped brush and an appropriate shaving soap of professional quality - we recommend the use of ARKO Shaving Sticks. The soap should be applied to the skin by the brush in circular motions; it is not required to pre-wet or lubricates the bristle or skin with any water or product, using a firm grip on the stock of the brush. The face should be covered with a liberal application of the soap, applying extra pressure on the technique around the jaw and chin areas.
 The purpose of doing this is paramount to the outcome of the shave and for the smoothness of the procedure for the client. It is the application of the soap and the technique with which it is applied that is the most important part of the preparation! After around three minutes, the barber should work the soap into the bristle with his fingers, also allowing him to determine where he feels that the client will experience discomfort during the shave, (this comes with experience - the more you do this, the more you will develop) and should then note to pay particular attention to that area. Once again, soap up with a vigorous movement with the brush until the bristle is standing proud of the soap. The client is now ready to be shaved.
The shaving technique should be conducted from one side of the client, his right side if the barber is right-handed, left if left-handed. Starting from the lock, the barber should place his free hand, covered with a surgical glove, and stretch the skin in the opposite direction above the blade whilst briskly moving the blade in the downward direction in a smooth, long and confident stroke. (NB. Small, erratic and short strokes can break the skin causing redness and inflammation.) This should be practiced across the side of the face until you reach the edge of the lip and chin.
Once you have completed this stage, then you must shave the neck area. Most men have indifferent and irregular hair growth patterns on their face, so extra care should be exercised here. Shave the neck from the jawline to the near edge of the hair growth, taking extra care not to cross over into the "against the grain" area just yet. If like most men have, the hair at the base of the neck grows upward, then stop shaving at that point and complete the rest of the bared neck area to that mark. The client's head should then be moved slightly by the barber to face front so that his nose and chin are pointing forward. Pinching the nostrils with the thumb and second finger, whilst using your index finger to gently lift the front of the nose so that the philtrum (dent in lip directly below the nose) is pulled taught, the upper lip must now be shaved from the middle to the shaved side. Once completed the barber should then position the razor for the backhand stroke and shave the opposite side of the upper lip.
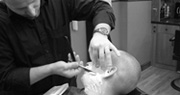
The barber must now repeat the procedure for the opposite side of the face, from the same position, by gently positioning the client's head with his nose facing the barber's abdomen (see photo at the top of the page). The face should now be shaved from the lock by using the backhand stroke. Once this is completed, again gently position the client's head towards the centre and continue to shave the chin and underneath the bottom lip. Quickly move directly behind the client and shave in an upwards movement the area at the base of the neck going with the grain of the growth. Stage one has been completed.
 The skin must now be treated with an Alum Block (Potassium Alum) for a number of reasons. Alum helps to reduce redness and razor burn caused by the friction of shaving, it cleans the pores and the skin surface with its antiseptic properties, it stops any bleeding that may have occurred during the shave, and as it is an astringent as well, it tightens the skin, providing better grip for the razor during the second shave. This procedure is simple, but very, very effective. Wet the gloved hand with warm water and gently moisten the skin. The alum block should also be dipped into warm water (not hot) and then in a gentle buffing motion run across the surface of the skin. Pay particular attention to red areas or bleeds, by moving the alum block in small circular motions until you are satisfied that the alum has penetrated the skin. Use the full surface of the block ends for bleeds and redness, sides for lip, and broad side for main facial area. It is important to not allow the block to dry-out, so continuous wetting with water should be adhered to during the course of the procedure. Once this is finished the block should be dried and returned to its container or box. Remember that for hygienic reasons and to reduce the risk of contamination in your salon of your client, a new block should be used for each shave, with the used block being handed to the client at the end of the shave to take home. Barbers should cost effectively to cover the cost of the block within the price of their shave. Stage two is completed.
Right, at this stage the client needs to be soaped up once again, giving the same attention to the technique as before. This is even more important at this stage as we are now going to conduct the upward shave, or shave against the grain. Some barbers don't do this, whether it is through fear or uncertainty, I am not sure, however this can be pretty comfortable for the customer if carried out correctly. Once the soaping up procedure has been strictly adhered to, then the client is ready to commence the remainder of the shave. (NB. For barbers who use a microw