

Get the Look: 2020 Fellowship Snapshot Image of the Year
By
HOB Salons
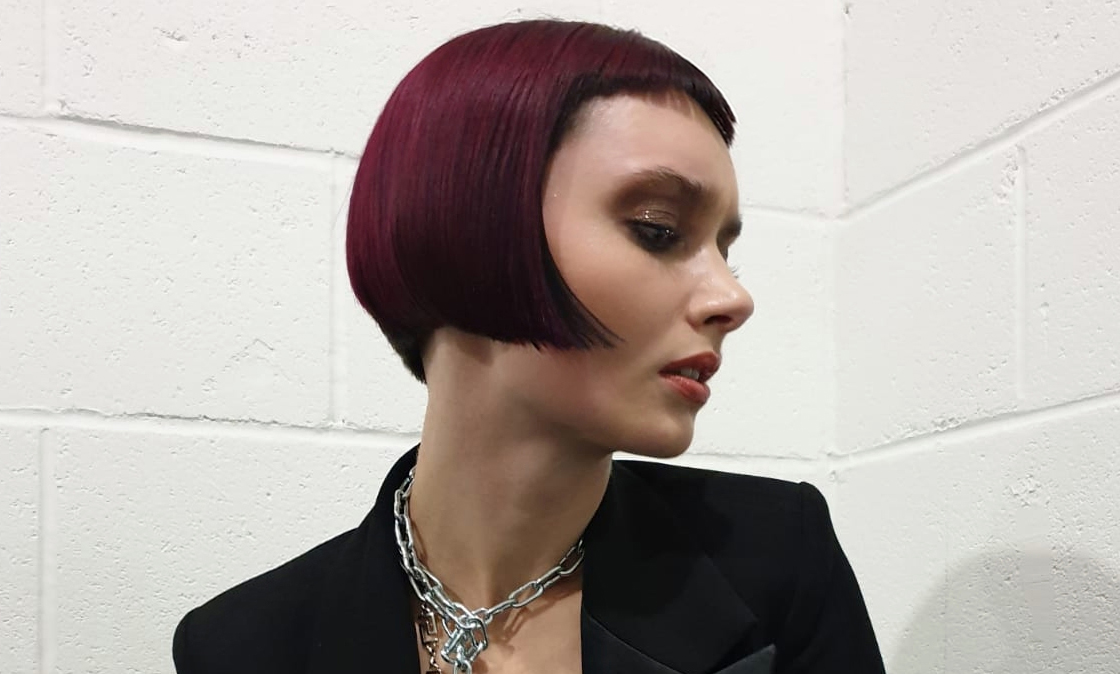
Nestor Sanchez from HOB Academy, London was named 2020 Fellowship for British Hairdressing Snapshot Image of the Year at this year’s annual awards.
Held virtually for the first time due to COVID-19 restrictions, Nestor was chosen as the winner over hundreds of other non-professional images entered the competition, of his model backstage at last year’s Alternative Hair Show.
Get the look:
Cut by Nestor Sanchez at HOB Academy, London
Colour: Chris May and Warren Boodaghian
Photography: Jake Unger
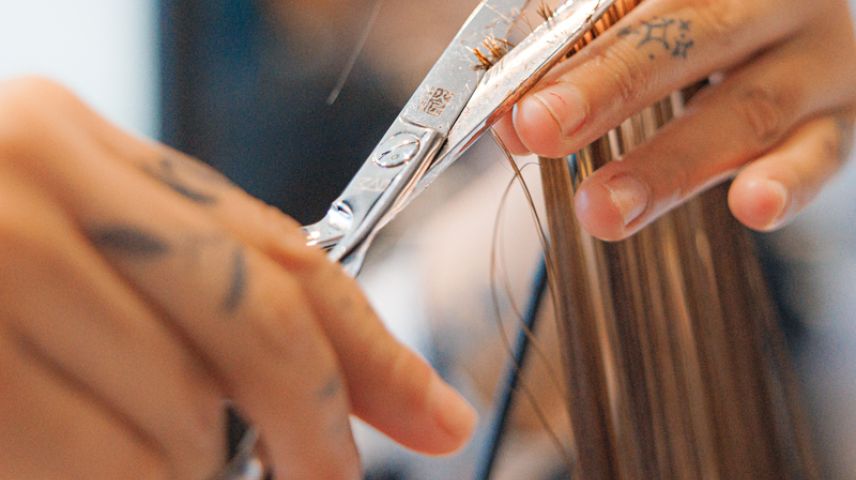
CUT
- Divide the front and back of the head by taking a section that travels from the crown to behind each ear. Then split the back area with a vertical section into two equal sides and finally decide the angle of the desired weight line, as this will dictate the shape of your sectioning pattern.
- Now using your fingers, elevate each section gradually to create a classic graduated shape with a seamless build-up of weight. Once the back is completed, refine and create an outline that is sympathetic and works in harmony with the neutral growth patterns.
- To connect the sides, over direct the hair to the last section from the back using the previous angle and elevation. Tap the ear to release some of the tension and avoid the dreaded hole in your shape caused by the protrusion of the ear.
- Once the internal shape has been completed, working from the back continue your outline all the way to the front, making sure that whatever shape you are creating complements and enhances the bob structure and facial features. In this case, a curved/triangular line was created to show off the model’s neck and make the lips the focal point.
- The fringe was cut using pivoting sections from a middle parting. A round layer was used to create a juxtaposing effect of strong outlines with a dishevelled fringe.
- Finally, the hair was prepped with oil, conditioning spray and a wrap-drying technique using a Vess brush. Irons were used to give the hair shine and that winning photo finish.
COLOUR
- This colour technique is approached by creating two areas of the head. Start by isolating section A, work an inch into the hairline at the fringe area creating a curved section that sits underneath the occipital bone.
- This creates section B (top) and section A (bottom)
- Start by lightening the ends of section B using Wella Professionals Blondor Crème with 4%, processing until achieving a result that is two levels lighter than section A.
- Rinse and remove the lightener following manufacturers guidelines.
- On damp hair, resection the hair back into A and B.
- Section B is recoloured with a deep magenta shade using Color Touch by Wella Professionals 20g 55/65 + 10g 10/6 + 2g 0/68 + 64mls 1.9% Color Touch Emulsion
- Section A is recoloured with a black grape shade using Color Touch 20g 33/66 + 3g 0/68 + 46mls 4% Color Touch Emulsion
- The colour was then amplified by using High Magenta from Color Fresh Create mixed with conditioner.